Are you about to invest in a pre-owned RV and worried about hidden dangers? Buying a used RV can be a smart and cost-effective way to embrace the nomadic lifestyle; but safety must come first. As certified RV technicians and passionate industry enthusiasts, we know that flaws overlooked during a purchase can lead to expensive and even dangerous problems down the road.
In this guide, we walk you through exactly how to inspect a used RV, from structural integrity to electrical systems and propane safety. We also highlight the used RV red flags that often scare away savvy buyers and explain what to do when you spot them.
By reading this post, you will gain the confidence to evaluate any pre-owned RV thoroughly, negotiate effectively, and avoid surprises that could derail your adventures.
Key Inspection Areas for Used RV Safety
Before committing to a used RV, a thorough safety inspection must take priority. As certified RV technicians, we recommend dividing the process into clearly defined areas. These checks help you spot issues and know how to inspect you RV like a pro.
Exterior & Structural Integrity
The RV’s exterior provides important clues about its condition. Start with the roof. Scan for soft spots, wrinkles, and cracked sealant, which often indicate potential leaks. Any sign of delamination between layers of the roof or sidewalls could point to costly structural damage. Use your fingertips to gently press suspect areas.
Then examine the sidewalls. Look for bubbling paint, warping, or separation - these are classic red flags that may reflect water intrusion. Inspect the undercarriage, frame, and chassis for corrosion, rust, or weld cracks. Rust near seams or supports can compromise the structural integrity of the RV.
Next, inspect the tires. Check the DOT date on the sidewall to determine the manufacture year. Old, brittle, or cracked tires raise both safety and maintenance concerns. Make sure the tread remains evenly worn. Finally, verify if axles and suspension components appear clean and properly maintained.
 Slide-Outs & Seals
Slide-outs provide living space but can be tricky. Extend and retract each slide to test its smoothness. Listen for grinding, binding, or hesitation all signs of mechanical trouble. While a slide is opened, check the seals carefully.
Seals that look brittle, cracked, or separated from the frame likely allow water intrusion. Mold, mildew, or discoloration around the edges signals past leaks. These symptoms could lead to serious problems, because poorly sealed slides often cause insulation problems, water damage, and structural stresses.
Electrical & Propane Systems
A fully functional electrical system is non-negotiable. Begin with the 12-volt system: test lights, fans, and appliances. Open the breaker panel and confirm that each circuit operates correctly. Then check the 120-volt system by plugging in standard household devices. Faulty outlets, flickering lights, or hot switches may indicate wiring issues.
Battery condition matters too. Examine battery age, terminal corrosion, and physical swelling. Weak or damaged batteries reduce reliability and may pose fire risks.
Next, evaluate the propane system. Turn on propane-powered appliances like the refrigerator or water heater to ensure they ignite and operate properly. Use a soapy water solution to test for leaks on connections. If your nose picks up the scent of gas, that’s a potential deal breaker. Ask the seller for a certified gas-system inspection, including a regulator check.
Plumbing & Water Systems
Water systems are essential for comfort, but they can hide hazards. Turn on faucets, the shower, and the toilet while the water pump runs. Watch for leaks, drips, or weak pressure. Then check all plumbing lines for signs of moisture or staining.
Inspect the water tanks (fresh, gray, and black) for integrity, odors, or damage. Poor tank condition may point to past leaks or neglect. Open the water heater access panel. Run it on both electric and propane if possible, then verify it heats safely without pressure loss or charred wiring.
Interior Condition
A clean interior reflects careful maintenance. Begin with flooring. Step gently on carpets, vinyl, or plywood-subfloor surfaces to identify soft spots or depressions, which may hint at water damage. Musty, damp smells or visible stains on walls and ceilings often indicate past leaks.
Check all cabinets, drawers, and doors. They should open and close smoothly, without sagging or resistance. Test major appliances (refrigerator, stove, microwave, furnace, air conditioner) under real conditions. Verify they turn on, cycle correctly, and show no error codes or damage.
Safety Equipment
Every RV should have working safety devices. Confirm that smoke and carbon monoxide detectors are present, not overdue, and operational. Replace any batteries that seem old or unreliable. Check that a fire extinguisher is mounted in an accessible location. Review its manufacture date and ensure the pressure gauge reads within the safe zone.
Beyond these basics, examine other safety gear: look for LP gas detectors, emergency exits, and door locks. Make sure they all function. If any device fails to meet modern standards, consider that a red flag or negotiate for a replacement.
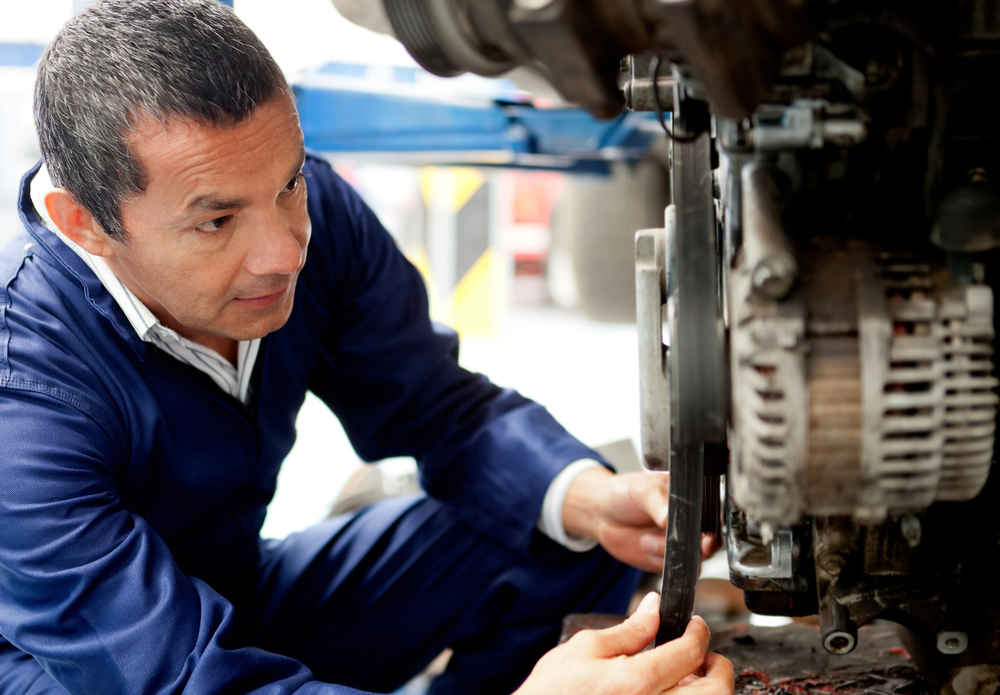
Mechanical & Driving Systems (Motorhomes)
If you are inspecting a motorhome rather than a towable RV, don’t skip a full test drive. While driving, listen for unusual engine noises like knocking, pinging, or hissing. Watch for fluid leaks under the engine bay or around wheel wells. Observe steering response, braking efficiency, and suspension behavior. Sloppy steering and delayed braking can indicate worn components or unsafe conditions.
Check engine service history. Ask to see logs of oil changes, transmission servicing, and filter replacements. If available, hidden mechanical problems show up here. Without a reliable maintenance history, pre-purchase risk goes up dramatically.
Documentation & Title Verification
Safe buying goes hand in hand with proper documentation. Ask the seller to provide the title and verify that the VIN matches all labels and paperwork. Confirm that the RV has a clear history - no salvage title, unreported damage, or odometer discrepancies.
Request maintenance logs, repair receipts, and system manuals. These can reveal past problems or repeated issues in areas like electrical wiring or roof leaks. Having an owner’s manual gives you insight into proper service intervals. Always demand documentation before signing any purchase agreement.
By carefully inspecting these critical areas (structure, seals, systems, safety gear, and documentation) you significantly reduce risk. Recognizing problem areas early empowers you to negotiate confidently or walk away if needed. This is a reason a professional inspection can be a smart investment.
Why a Professional RV Inspection Is Worth the Investment
 A thorough personal walkthrough helps identify many issues, but a certified RV inspector brings deeper technical expertise. Professional inspections often catch problems that buyers miss, especially those hidden behind walls, under flooring, or within mechanical systems. Understanding how to inspect a used RV remains important, yet pairing your own evaluation with an expert review adds another layer of protection.
Certified inspectors examine structural integrity, electrical systems, plumbing lines, propane functionality, and chassis components with specialized diagnostic tools. Their findings highlight major issues that may not be visible during a standard walkthrough. Reports typically include photos, system-by-system ratings, and repair estimates. These insights help buyers negotiate effectively or decide whether the RV meets long-term safety expectations.
Some inspectors also test appliances under load, measure moisture levels in ceilings and walls, and analyze fluid samples in motorhomes. Detailed testing reduces the risk of buying an RV with hidden water damage or mechanical failures. An inspection also provides peace of mind, especially for first-time buyers unfamiliar with RV component systems.
Professional inspections can also protect your investment by preventing costly repairs. Issues like delamination or propane leaks may appear minor but escalate quickly without early detection. A qualified inspector ensures no critical safety component is ignored. Buyers gain a clear picture of total repair needs, maintenance expectations, and long-term reliability.
Frequently Asked Questions (FAQ)
Final Safety Tips & Advice
Buying a used RV is an exciting step, but safety must remain your top priority. As certified RV technicians and experienced RV enthusiasts, we encourage prospective buyers to follow these final guidelines. These tips will help you feel confident, spot problems, and know how to inspect a used RV properly.
-
Take Your Time During Inspections
Rushing through an inspection increases risk. Walk every corner, test every system, and don’t feel pressured to make an immediate decision. Schedule multiple visits if needed, and bring a trusted friend or RV-savvy person to help. Taking this slower, more deliberate approach often reveals issues that others overlook.
-
Bring the Right Tools
Carry a flashlight, a moisture meter, a tire gauge, and a small mirror for hard-to-reach areas. These simple tools make a big difference when checking for soft spots, water damage, or improper welds. Use them to thoroughly assess sidewalls, roofs, undercarriage, and slide-out seals.
-
Ask Precise, Technical Questions
When you talk to the seller, request specific details. For example, ask when the roof was last resealed, how old the batteries are, or whether the propane regulator has been replaced. These targeted inquiries force a more transparent dialogue and often surface crucial information about past or recent issues.
-
Use an Inspection Checklist
Whether you're performing your own walk-through or relying on an expert, a detailed checklist ensures nothing gets missed. Reference a pre-purchase checklist found on the Campers Inn blog or similar RV maintenance resources. Following a well-structured checklist helps you evaluate all critical systems, from electrical panels to water tanks, effectively and consistently.
-
Leverage a Certified Inspector
Even if you feel confident in your own inspection, hiring a certified RV inspector greatly reduces risk. A professional can conduct a Level 2 or even Level 3 inspection, covering structural, mechanical, and safety-critical systems. Their report can highlight serious concerns, reveal hidden damage, and offer repair estimates to guide your negotiation. Use this report as leverage during purchase discussions.
-
Evaluate Repairs and Negotiate Strategically
Use the inspection report to negotiate repairs or a better purchase price. If serious issues, such as propane leaks or structural delamination, surface, request that the seller address them before closing. In some cases, walking away may be the safest and most cost-effective choice. Never compromise on components that affect safety or long-term reliability.
-
Plan for Future Maintenance
Budget for regular upkeep. Just because you’ve inspected systems now doesn’t mean they won’t require service later. Schedule roof reseals, battery checks, and plumbing inspections regularly. Staying on top of maintenance prevents small problems from escalating into major, expensive repairs.
-
Keep Thorough Documentation
Maintain detailed records of your own inspections, professional reports, service history, and repairs. Store receipts, photos, and system manuals in a dedicated file. This documentation not only helps during future inspections but also enhances resale value and trust when you decide to sell or trade in your RV.
-
Verify Safety Equipment Regularly
After purchase, and on an ongoing basis, test smoke detectors, carbon monoxide alarms, fire extinguishers, and LP gas detectors. Replace batteries or units that fail inspection. Confirm emergency exits operate properly. Keeping safety devices in working order is vital to protecting lives.
-
Trust Your Instincts
Even if an RV looks great on paper, something may feel “off.” Unusual odors, rushed sellers, or reluctance to provide maintenance records are legitimate warning signs. Paying attention to your intuition can protect you from bad deals or unsafe builds. If you feel uncomfortable, step back, do more research, or bring in a third-party expert.
By combining a careful personal inspection with a professional evaluation, you empower yourself to make a well-informed decision. Knowing how to inspect a used RV methodically and being alert to used RV red flags keeps your safety and investment secure. Approach the process thoughtfully, stay patient, and don’t cut corners. With the right preparation, you’ll not only find a great pre-owned RV but also preserve peace of mind as you hit the open road.


