
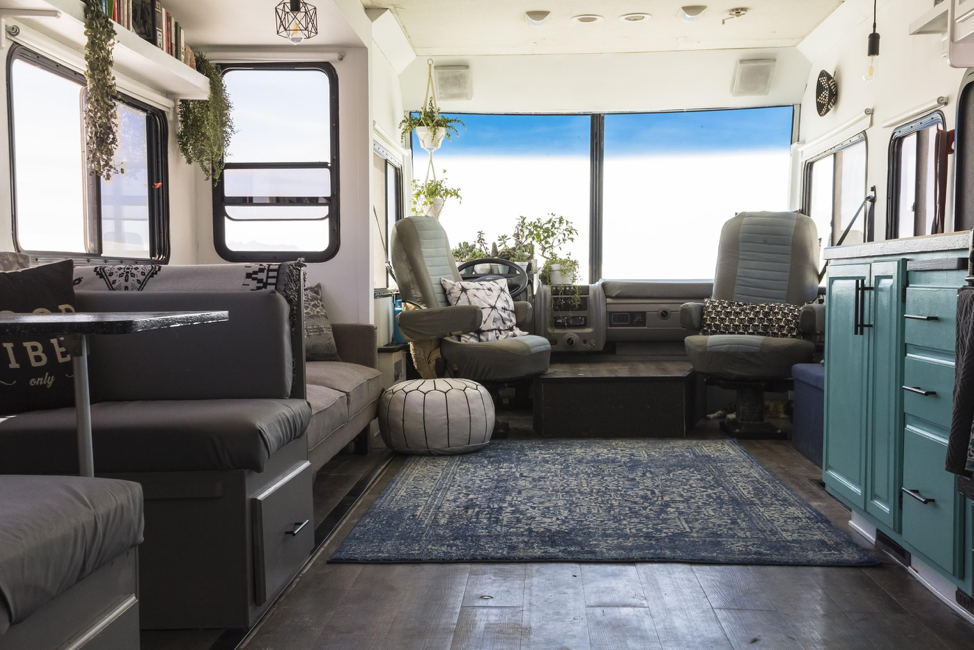
When we purchased our RV, it looked nothing like the colorful, whimsical home on wheels you see today. We decided a used motorhome, model year 2007-2008, would be the best fit for our budget and travel style. Even before we picked out our RV, we planned to remodel the interior because we knew it would be outdated.
This made our purchase simple, as we were just looking for the right interior layout. Once we selected the winning RV, we got to work remodeling.
We set a budget of $1,000 for the remodel since we had just left our full-time jobs. With this budget, we planned five main projects to completely revamp the space. In the year-and-a-half since our initial remodel, we have made many more upgrades, but our first few projects made the biggest difference in creating an RV that feels like home. If you are planning to remodel on a budget, we highly suggest starting with the five following projects.
Window Treatments ($110)
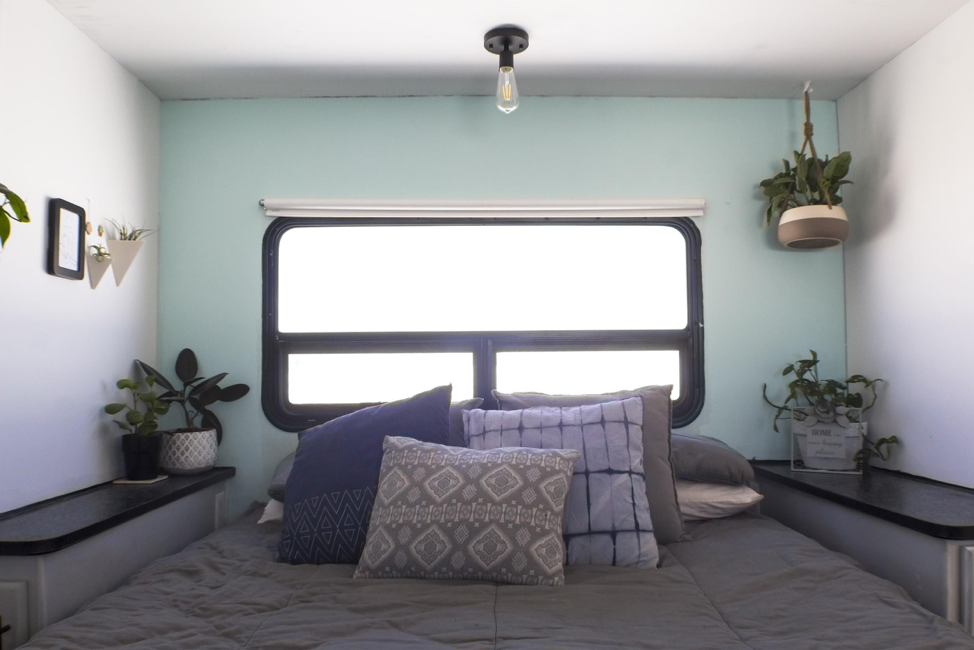
After we brought our RV home, the first thing we did was remove the valances around the windows.
We have seen some people update valances with more modern fabrics. But, we didn’t like how they covered a large part of the window and extended into the room, so we decided to remove them. We replaced them with simple wall-mount roller shades we bought at Lowe’s Home Improvement. The roller shades simplified the space and made it feel larger.
Paint ($140)
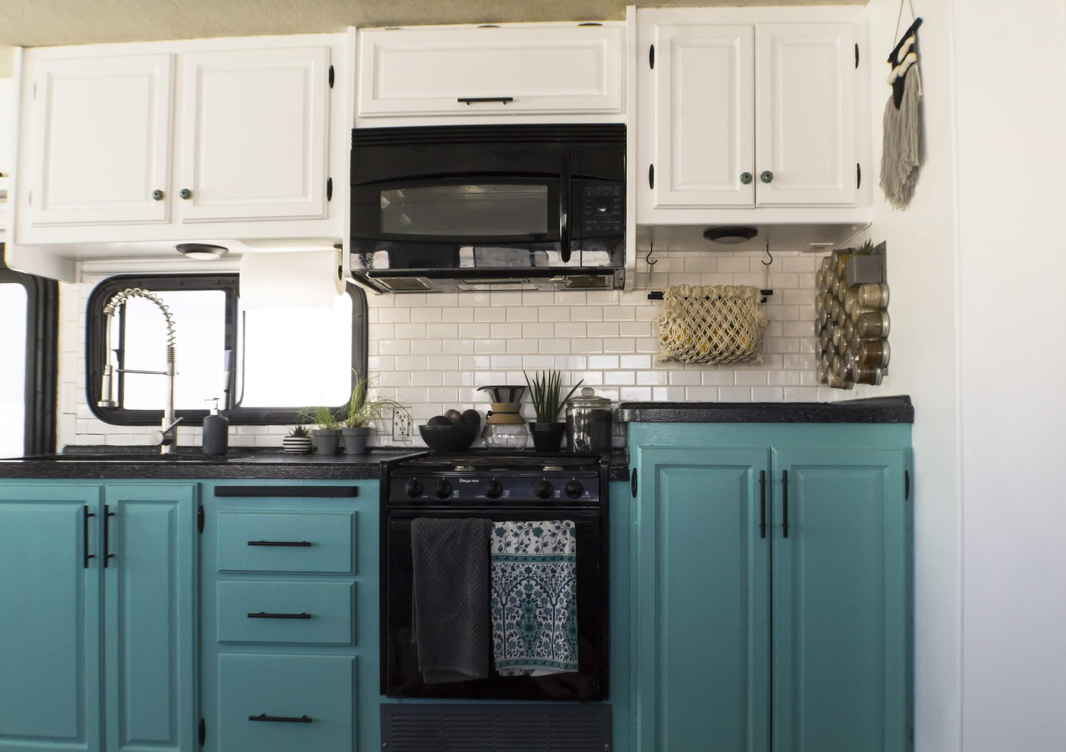
Next, we repainted everything, including the walls, cabinets, wooden dinette bench and fridge. This requires prep work. To prep, we sanded the cabinets and walls with an electric sander and 60-grit sandpaper. Then, we cleaned everything with trisodium phosphate (TSP) cleaner and taped off the areas we did not want to paint. Finally, we removed the drawers, cabinet doors and cabinet door hardware.
We painted one coat of primer and two coats of paint. We used the Sherwin Williams Infinity paint line, which has held up well over the past 18 months. We painted almost everything white, as the bright color helps small spaces feel larger. We painted our lower kitchen cabinets turquoise and painted our dinette bench gray since white seemed dangerous for a surface we’d prepare food on.
Lastly, we chose black chalkboard paint for our fridge. This turned out to be one of our favorite details. We use it to record the number of days we’ve been on the road (550 so far), along with our current location, to-do lists and the contents of the fridge. Painting took us about a week to complete, and, once we finished, things started to look good.
Floors ($320)
After we painted, we decided to re-do our floors. First, we had to rip out the tan carpet and pull tons of staples out of the subfloor. It took us about a day to complete this task.
We chose laminate peel-and-stick faux wood boards for our new flooring. Real wood may have looked nicer and held up better over time, but it also would have been very heavy and, in an RV, it’s important to consider any added weight. We have seen other RVers use snap-together laminate tiles, which are also beautiful. Unfortunately, those wouldn’t have worked with our slide. We used the this YouTube video for directions.
Making oddly shaped cuts for the corners was tricky, but, overall, installing the floor was not too difficult. Installation in the center of the room was quite simple and we were happy with the result.
For our bathroom floors, we chose groutable laminate peel-and-stick tiles, which matched our faux wood floors. With the fresh paint and the new floors installed, our space was looking homey.
Furniture Update and Dinette Revamp ($310)
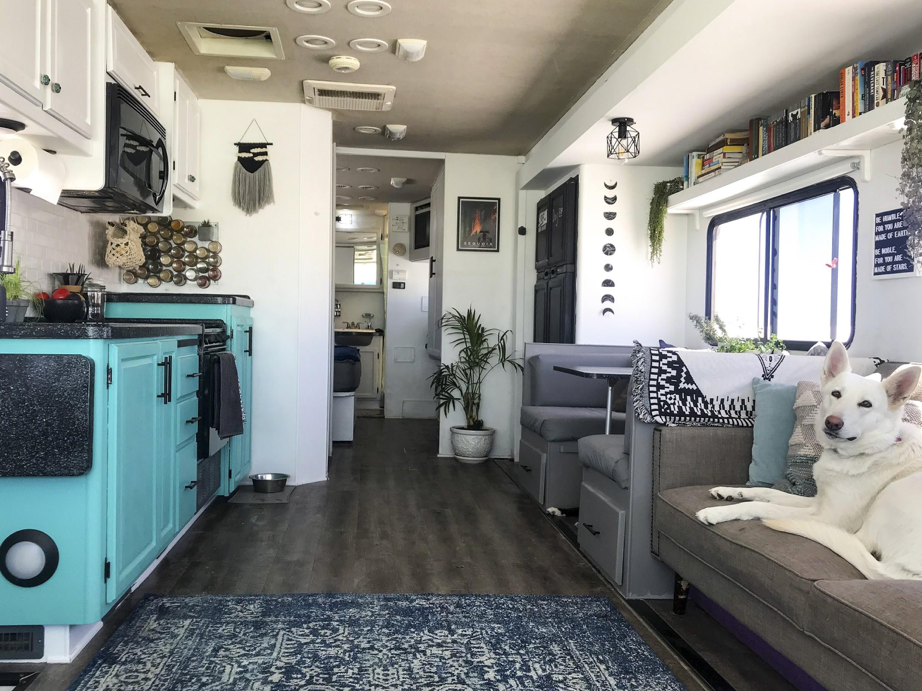
After we painted our interior shades of white, gray and black, the tan leather couch our RV came with didn’t match. This offered us the perfect opportunity to replace it with a chic, gray futon. Removing the couch was a bit of a challenge, as we had to disassemble it to fit it through the door. We also removed the large recliner behind the passenger chair and replaced it with an ottoman bench. This really opened up the main living space.
Our dinette cushions were also in need of modernization. They were a funky green-and-tan fern print. So, we decided to take on the task of reupholstering them. To do this, we followed a simple upholstery technique seen on YouTube.
We purchased plywood and a simple gray outdoor fabric, which is recommended for best overall wear.
Then, we cut the plywood to the size of each cushion piece, wrapped the cushion foam and plywood in the new fabric, and stapled the fabric to the plywood. The key is to pull the fabric as tightly as possible before stapling. This project is doable with two people and it’s much cheaper than having the cushions professionally reupholstered. With new furniture and a dinette makeover, our remodel was nearly complete!
Decorations ($120)
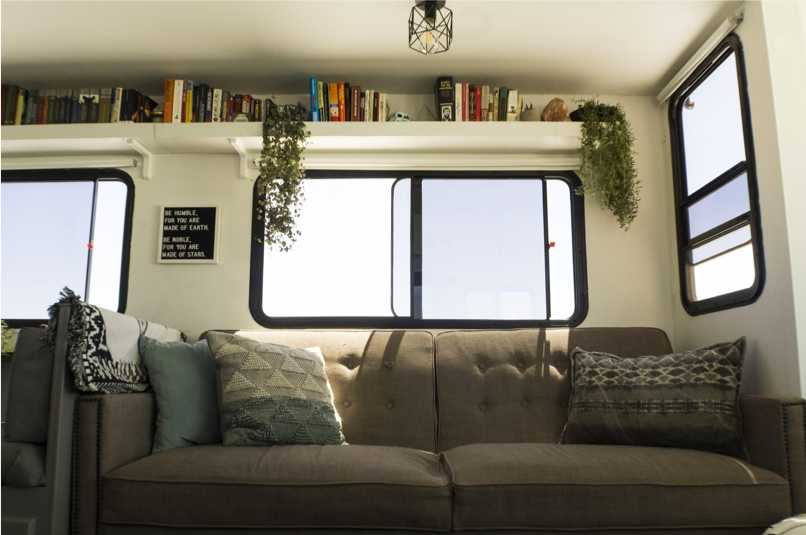
Our final step was the most fun. Decorating is all about personal preference, and we tend to prefer neutral colors with pops of bright color. For our accent colors, we chose turquoise and indigo blue, which complement the gray, black and white. No matter what colors or style you choose, decorating will make the most difference in making your space feel like home. We added pictures, wall decor, blankets, throw pillows, a pretty rug and lots and lots of plants. We chose our decor with our budget in mind and we were happy with the result.
As we mentioned before, we have completed more extensive remodeling in the past few months. We removed some unused cabinets, installed a subway tile backsplash, updated the light fixtures, upgraded the countertops, added stainless-steel faucets, replaced the cabinet pulls and swapped the glass shower door for a shower curtain.
We also gave our cab area a full makeover to add more seating and open up the front windows for a better view. These updates have made our RV even cozier. However, the initial remodel has still made the biggest overall difference.
If you are considering road life, but are worried about outdated interiors, you can modernize your home on wheels with a few simple projects. All of this can seem a bit overwhelming, but, little by little, your home will start to come together in the best possible way. After all, if you are planning to live, travel and maybe even work from your RV, you want it to be a space that you love. What better way to love your home on wheels than to make it entirely your own? We are thrilled with our results, and, with some time and elbow grease, you will be too.
Have a question about RV remodeling? Any tips you would like to share? Drop a comment below, and we’ll see you on the road!
Follow the Bingers on Instagram @lifeamongpines
Website: https://www.lifeamongpines.com/
Facebook: https://www.facebook.com/LifeAmongPines/
Twitter: https://twitter.com/lifeamongpines
Are you heading out on summer RV adventures? Download our Motorhome Maintenance Checklist to make sure your rig stays in tip-top shape.

All pictures courtesy and copyright of the Life Among Pines.
