There's a specific kind of silence that happens during a trade-in walkthrough. A customer pulls in proud of everything they've done to their rig, the $4,000 solar setup, the custom decal work, the leather recliner they special-ordered, and then watches an appraiser's face stay completely neutral through all of it. That silence is expensive.
Here's the thing nobody tells you when you're buying upgrades: resale value doesn't care how much you loved something. It cares whether the next owner will use it, whether an appraiser can verify it works, and whether it fits what buyers are actually shopping for in 2026. Spend $3,000 on a wraparound sound system, and a buyer might shrug. Spend $950 on a lithium battery and watch their eyebrows go up.
We've walked enough people through appraisals at the Jacksonville lot to know which upgrades move the needle, and which ones are basically expensive for personal decoration. Some of them are intuitive. Some of them are genuinely surprising. All of it is worth knowing before the next trip to the accessory aisle, or before listing the rig for sale.
Below are 10 upgrades that consistently show up on the right side of that ledger, along with real prices, real brands, and a few honest admissions about upgrades that didn't pay off the way we hoped.
Why Some Upgrades Pay Off (and Others Don't)
 Not all RV renovation ideas are created equal, and the distinction matters more than most owners realize until they're standing in front of an appraiser.
Here's the rough rule of thumb: upgrades that improve function tend to hold their value. Upgrades that reflect personal taste tend to lose it. A new battery system, better suspension, or a working water filter solves a problem every future owner will also have. A hand-painted mural of a mountain range solves a problem exactly one owner had, and that owner is you.
This isn't a knock on personalization; go wild with your own rig, seriously. But if resale value is part of the calculation, it helps to think like an appraiser for a second. Appraisers (and buyers browsing a lot) are trained to notice systems: does the power setup work, is the suspension solid, does the water taste like it came from a hose instead of a lake. They're far less moved by finishes, because finishes are subjective, and buyers know they might rip them out anyway.
Real talk: we've seen owners sink real money into a beautiful custom upholstery job, only to watch a buyer mentally calculate the cost of reupholstering it again in a color they like. Cosmetic work can absolutely make a rig nicer to live in. It just doesn't reliably translate to dollars on the appraisal sheet the way a functional upgrade does.
So, as we go through the list, notice the pattern: almost everything here either fixes something that breaks, improves something that matters daily, or gets verified with a receipt. That's not a coincidence. That's the whole game.
1. Solar Power Setup
Solar used to be the upgrade only committed boondockers bothered with. Not anymore. Buyers shopping within the $75,000-$150,000 range increasingly expect it; the same way home buyers expect central air.
The Samlex SRV-200-30A is a solid entry point at just over $1,000. It's not an MPPT system, so it squeezes slightly less power out of a panel in partial shade compared to pricier setups, but for the average RV roof with decent sun exposure, that difference is minor.
What makes solar different from a lot of RV accessories on this list is that it's easy to verify. A buyer can look at the panel, check the charge controller readout, and know within thirty seconds whether the system actually works. No guessing, no taking your word for it.
Pro tip: keep the receipt and any installation paperwork. "Trust us, it's a good system" doesn't move an appraisal. A dated invoice does.
2. Lithium Battery Upgrade
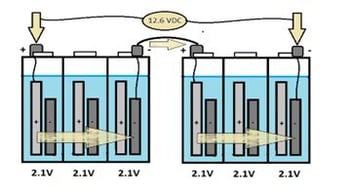
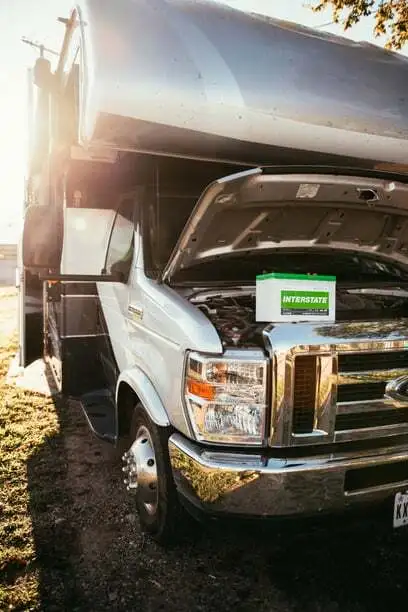
If solar is the upgrade buyers expect to see, lithium batteries are the upgrade that makes solar worth having. Pair a good panel setup with the battery bank that came stock in most RVs (usually a pair of lead-acid batteries that struggle to hold a charge by year three) and you've built a system that looks great on paper and disappoints in practice.
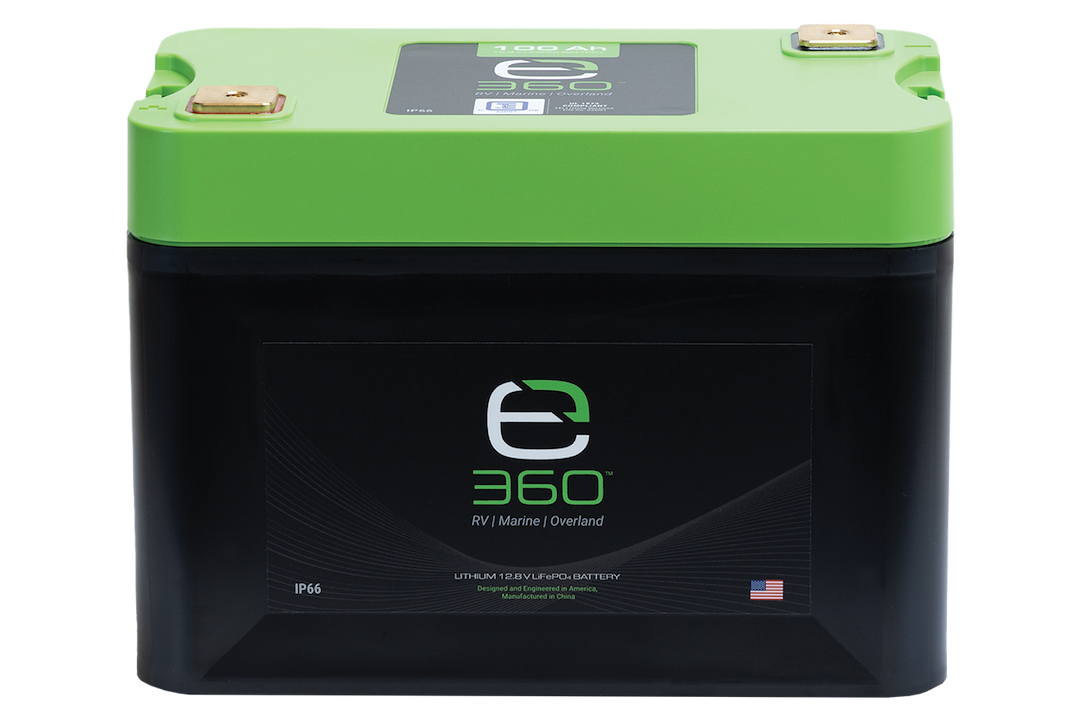
Expion 360's EX-G27-100C is a 100Ah lithium battery priced at $1,350, built in the Group 27 form factor that fits into most stock battery trays without modification. Battle Born, the name most RV owners already recognize, sells a comparable 100Ah battery for less (around $950) so it's worth comparing both before deciding; Expion's slightly higher price reflects a larger case size and higher continuous discharge rating, which matters more for owners running heavier loads like induction cooktops or larger inverters.
Either way, the upgrade solves a problem every RV owner eventually runs into dead batteries by day two of a trip, a fridge that stops keeping food cold overnight, a generator that must run more than anyone wants it to. Lithium fixes all of that, and it fixes it in a way a buyer can picture themselves benefiting immediately.
Real talk: lithium batteries are one of the few upgrades on this list where going bigger than you think you need pays off. A single 100Ah battery rarely covers real-world RV living - Expion's own EX-G24-80C runs smaller and cheaper at $1,050, but most owners end up wishing they'd bought the higher-capacity option, or a second battery entirely.
3. LED Lighting Upgrades
This is the cheapest entry on the entire list, and it might be the one with the best return on effort. Every RV that rolled off the factory floor before the mid-2010s came with incandescent bulbs that cast a dim, slightly yellow glow, the kind of lighting that makes even a freshly cleaned rig look a little tired.
Swapping to LED is about as low stakes as RV upgrades get. Individual puck lights run $8 to $32 each from brands like RVZONE, Valterra, and Command Electronics. Bulk bulb kits for the small dome and accent lights (the T10 and 1156 style bulbs) go for $11 to $30 for a 20-pack. A full interior conversion, dome lights and puck lights and switches included, realistically lands somewhere between $150 and $300 for most travel trailers.
What buyers notice isn't the tech. It's the effect. LED throws out a cleaner, whiter light that makes cabinetry look newer; countertops look brighter, and the whole interior feels less like 2008. It's the closest thing on this list to a coat of paint for the inside of your rig.
Pro tip: don't just swap the ceiling lights and call it done. Under-cabinet and accent lighting make a bigger visual difference than people expect, and they're the same $10-a-pop puck lights.
4. Suspension/Handling Upgrades
Nobody buys an RV because they're excited about the suspension. But everybody notices when the ride is rough, and a rig that sways, bounces, or feels unstable on the highway is a rig that makes a buyer nervous, even if they can't articulate exactly why.
The MORryde CRE3000 is the standard entry point: an equalizer upgrade that swaps the stock steel setup for one that uses rubber to smooth out the bumps. One owner's real invoice broke down to about $300 in parts and $500 in labor, landing at $800 total; worth knowing upfront, since suspension work is one of those upgrades where the labor line can rival the parts line. SumoSprings helper springs run cheaper and are a reasonable middle step if the full equalizer swap feels more than the rig needs.
For owners who want to go further, MORryde's independent suspension system runs closer to $1,000 per wheel. That's a serious investment, and honestly, it's probably overkill unless you're racking up serious mileage or towing something heavy on a regular basis.
The resale case here is less about buyers actively shopping for "upgraded suspension" and more about what they experience during a test tow or a walkaround. A stable, well-handling rig just feels like it's been taken care of. That impression is worth more than people give it credit for.
Real talk: this is the upgrade most likely to get skipped because it's invisible until you're the one behind the wheel. If budget is tight, it's fair to rank this below solar and batteries, but don't rank it last.
5. Water Filtration System
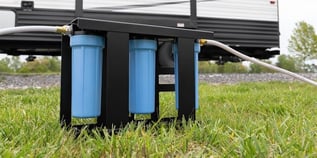
RV water has a reputation, and it's not always fair, but it's not always wrong, either. Depending on the campground, what comes out of the spigot can taste like a garden hose, smell faintly like chlorine, or worse, carry contaminants nobody wants to think too hard about.
Camco's Evo X3 is the system worth knowing about here: roughly $500 for a genuine triple-stage setup that filters sediment and chlorine in the first stage, lead and VOCs in the second, and (thanks to a 0.2-micron electropositive cartridge) viruses, bacteria, and cysts in the third. That last stage matters more than it sounds. Most basic inline filters can't touch viruses at all; the pore size tight enough to block them would also choke off water flow, which is why the Evo X3's dedicated third-stage cartridge is worth the extra cost over a single-canister filter.
It's not the cheapest upgrade on this list, and the individual cartridges will need replacing over time. But it solves a problem that touches literally every part of the RV experience (drinking water, cooking, showers, brushing teeth) and it's the kind of upgrade a health-conscious buyer, especially one planning to boondock or travel with kids, will actually ask about.
Pro tip: the whole unit mounts on its own stand outside the RV, which means it's easy for a buyer to spot during a walkthrough. No digging through a cabinet required to prove it's there.
6. Awning Replacement/Upgrade
A torn, faded, or manually-cranked awning is one of those things that quietly tells a buyer the rest of the RV probably hasn't been maintained either, even if that's not true. Awnings take a beating from sun and wind, and they show it faster than almost anything else on the exterior.
Manual awnings run $300 to $800 to replace, while power awnings from Dometic, Carefree RV, or Lippert land anywhere from $600 to $2,500 depending on features like integrated LED strips or automatic wind sensors. If the frame and arms are still solid and it's just the fabric that's shot, there's a much cheaper path: one owner on a Forest River forum swapped in a ShadePro replacement fabric for $125 to $150 and had it done in under 40 minutes.
That DIY route is worth calling out because it's genuinely accessible - no electrical work, no specialty tools, just a bit of patience and a willingness to follow a YouTube tutorial closely. Compare that to a full awning replacement, which usually means removing the old hardware entirely and reinstalling a new assembly, arms and all. That’s not how we’d want to spend our weekend.
Real talk: We've made the mistake of assuming "it still rolls out fine" means an awning doesn't need attention. Structurally, sure. Visually, a sun-bleached, water-stained awning ages a rig by about five years in a buyer's mind, even if everything else is showroom-clean. That’s like wearing a Tux with old, worn sneakers. It’s just a bad look.
7. Flooring Replacement
Flooring takes more daily abuse than almost anything else in an RV from mud, sand, wet swimsuits, the dog shaking off after a lake day and stock RV carpet or thin vinyl sheeting was never built to survive all of that gracefully.
Luxury vinyl plank has become the default replacement for good reason. Materials run $2 to $10 per square foot, and professional installation adds another $2 to $6 per square foot, though pricing varies a lot by region. One RV-specific installer in Phoenix quoted $175 per linear foot for a full swap. For the DIY-inclined, click-lock LVP (Luxury Vinyl Plank) keeps material costs low and turns the whole project into a weekend of labor rather than a big check to a contractor.
Flooring is also one of the rare upgrades on this list where the buyer's reaction is almost entirely visual and immediate. Nobody test-drives an RV's suspension in a walkthrough, but everybody looks down. Worn carpet with coffee stains from three owners is simply neglect. Clean vinyl plank reads as "this has been taken care of," even if the rest of the rig is identical.
One practical note worth passing along: RVs are weight-sensitive in a way houses aren't, so heavier materials like tile or thick engineered wood aren't the move here. LVP hits the sweet spot of durable, water-resistant, and light enough not to eat into cargo capacity.
Pro tip: if you're replacing flooring anyway, it's the easiest moment to also check the subfloor underneath for soft spots or water damage. Fixing that now costs a lot less than fixing it after new flooring is already down.
8. Update Kitchen Fixtures/Countertops
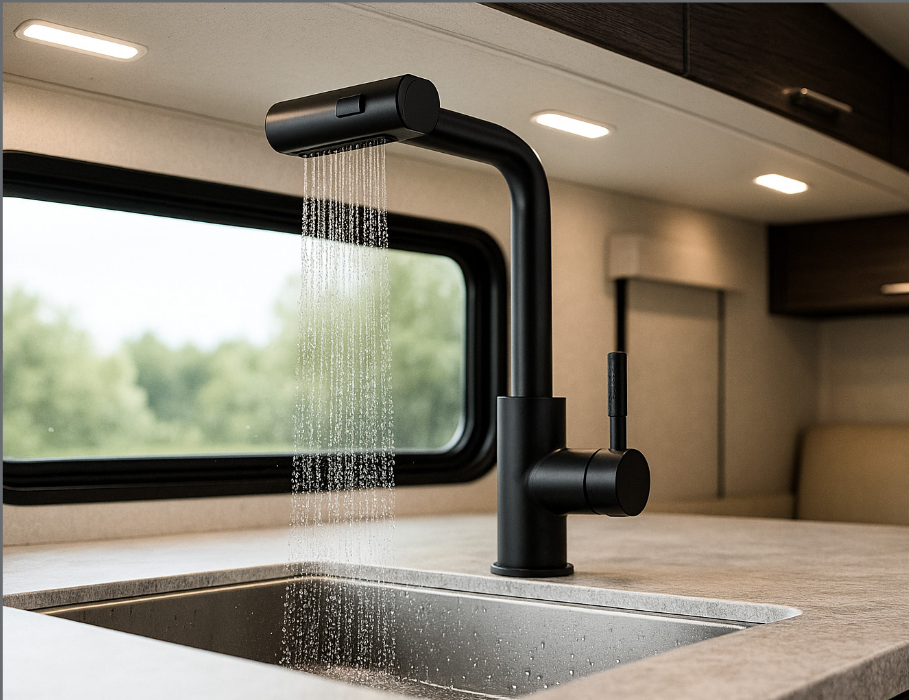
The kitchen is where a lot of RV living actually happens - morning coffee, dinner after a day of hiking, the inevitable "where do we put this" scramble with groceries and it's also where factory materials tend to show their age fastest.
The easiest, cheapest win here is the faucet. RV-specific models from Dura Faucet and Phoenix Faucets run $22 to $50 and take under an hour to swap, but the difference between a factory faucet and a clean brushed-nickel one is disproportionate to the price tag. It's a small upgrade that photographs well, which matters more than people think once a listing goes up online.
Countertops are the bigger project. Solid surface materials like Corian run about $65 per square foot installed, plus another $150 to $300 if the sink needs to be swapped or prepped for the new material. That's a real investment, but factory RV countertops are often laminate over particleboard - a material that holds water like a sponge the moment the seal fails, which is exactly the kind of hidden problem an appraiser's flashlight tends to find.
Real talk: here's a mistake worth avoiding - RV cabinets run taller than standard home kitchen cabinets, so if a contractor quotes a "standard kitchen spec" countertop without measuring your actual RV, there's a real chance you end up with a counter height that feels wrong for anyone under six feet tall. Always get someone who's measured your specific rig, not a general countertop shop working off assumptions.
9. Exterior Paint/Decal Refresh
First impressions happen in the driveway or the dealer lot, long before anyone steps inside. And exterior graphics are one of those things that age in a way that's hard to unsee once you notice it: faded colors, peeling edges, a decal scheme that was trendy a decade ago and now just reads as dated.
A vinyl wrap is usually the smarter move over a full repaint, and it's cheaper too. Partial wraps or decal refreshes run $200 to $1,500 depending on coverage, while a full professional wrap lands between $2,500 and $8,000; Class A motorhomes on the higher end, sometimes climbing past $12,000 for a full custom job on a 40-footer. Repainting costs more across the board, mostly because of the prep work involved, and it's permanent in a way a wrap isn't.
That permanence question actually matters for resale. A wrap can be pulled off and replaced if a buyer wants something different, or if it's just time for a refresh. Paint locks a buyer into whatever color and style choice was made years earlier. Wraps also double as a layer of protection for the original paint underneath, which is a nice bonus most owners don't think about until they're comparing quotes.
Pro tip: a full wrap isn't always necessary to get the visual refresh. A half-wrap on the sides, or refreshed decals on just the front and rear caps, can solve the "this looks old" problem for a fraction of the cost of covering the entire rig.
10. Backup Camera System
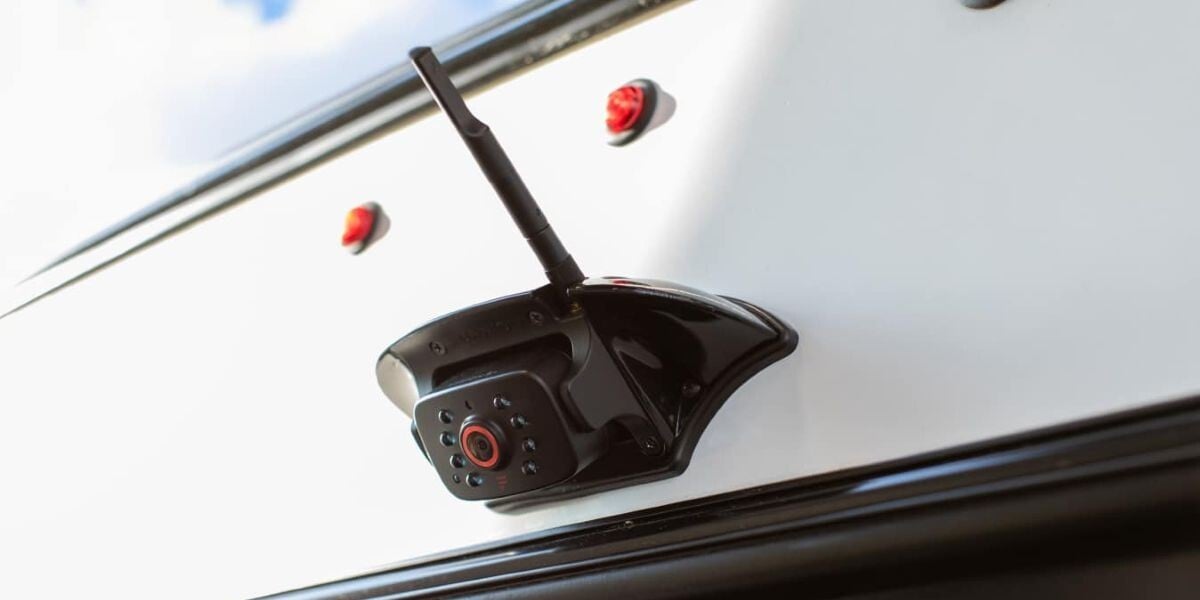
Backing up a 30-foot travel trailer with zero visibility behind it is a skill that takes most new owners an embarrassing number of attempts to learn. A backup camera doesn't just make that easier, it signals to a buyer that they won't have to relearn the hard way either.
Furrion is the name that shows up again and again in this category, largely because so many RVs come pre-wired for it. The entry-level Vision S, a single camera with a 4.3-inch monitor, runs $179.99 - an easy, low-cost addition for anyone whose rig doesn't already have one. Step up to the Vision S+ with a 7-inch monitor and side cameras, and pricing runs $649 to $959 depending on configuration, adding blind-spot visibility on top of the standard rear view.
This is one of the more straightforward upgrades on the list from a resale standpoint. It's not subjective, it's not a matter of taste, and buyers immediately understand why it's useful. A pre-wired connection already built into most RVs also means installation is often simpler than owners expect, no running new wire through the walls, just connecting into what's already there.
Real talk: if the rig is already pre-wired for Furrion (check near the rear bumper for the connector), don't overthink this one. It's one of the cheapest, fastest upgrades on the entire list, and skipping it because it feels like a minor add-on is leaving an easy win on the table.
What Buyers/Appraisers Actually Look At
Here's something that surprises a lot of owners the first time they go through an appraisal: the upgrades matter less than the proof of the upgrades.
An appraiser walking through a rig isn't just looking at what's installed. They're looking for documentation: receipts, installation dates, warranty cards, anything that turns "we added a lithium battery" into a verifiable fact instead of a claim. The same $949 Battle Born battery is worth more to a buyer who can see when it was installed and how much life is likely left in it than the identical battery with no paper trail at all.
Maintenance records matter here too, and not just for the big-ticket items. A folder (physical or digital) with receipts for the solar install, the awning fabric swap, the flooring job, even the $30 faucet, tells a buyer something bigger than any single upgrade does: this rig has been looked after by someone who pays attention. That impression carries weight beyond the line-item value of any one improvement.
Presentation matters too, in a way that's easy to overlook. A rig that's clean, decluttered, and organized during a walkthrough reads as better-maintained even when two rigs have identical upgrades. Appraisers are human. A messy, cluttered interior makes it harder to notice the new countertops. A clean one makes every upgrade easier to see and easier to credit.
Pro tip: before any trade-in or private sale walkthrough, put together a simple one-page list of every upgrade, the date it was done, and roughly what it cost. It takes twenty minutes and it does more for perceived value than almost anything else on this list.

The Bottom Line
Ten upgrades, a lot of price tags, and one theme running through all of it: the upgrades that pay off are the ones that solve a real problem, and the ones that don't are usually the ones that solved a problem only for the person currently living in the rig.
Nobody needs to do all ten at once, and honestly, trying to would be a good way to blow a budget on upgrades that could've been spread out over a few seasons. A reasonable approach: start with whatever's cheapest and most functional (LED lighting, a new faucet, maybe the awning fabric if it's looking rough) and work up toward the bigger investments like solar, lithium, or suspension as budget allows.
A few things worth remembering before the next accessories run:
- Function beats personalization when resale is part of the plan
- Keep every receipt, every invoice, every installation date
- A clean, decluttered rig makes every upgrade easier for a buyer to notice
- The cheapest upgrades on this list (LED lighting, a new faucet) often have the best return relative to cost
None of this means skip the personal touches. Live in the rig the way that makes it feel like home. Just go in with eyes open about which choices are for right now and which ones are actually building value for later.
…and with that we’ll see you down the road.